Stone Photo Holders - DIY Tutorial

Hi, fellow crafters! For this week's edition of DIY Friday, we're making some adorable photo holders from small stones! Bonus: this craft is totally kid-friendly, so we definitely recommend it for a weekend project with your little munchkins. Here's what you'll need to get started:
Materials:
- Stones/pebbles (we suggest ones with a nice flat bottom)
- Acrylic paint
- Paint brush
- Small gauge wire
- Needle-nose pliers
- Cutter pliers

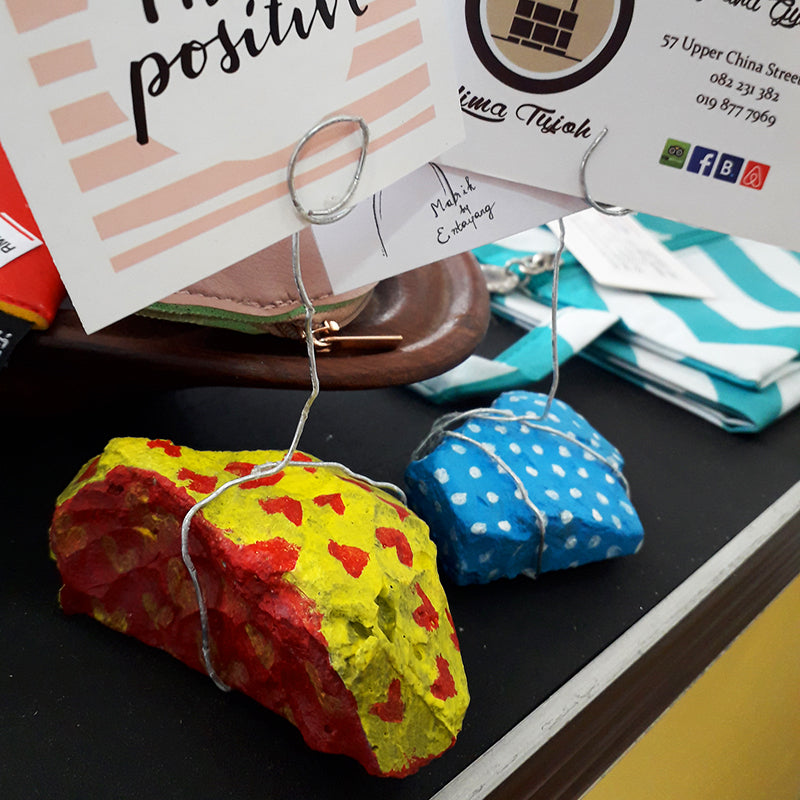
First things first, make sure the stones are nice and clean. And then it's time to paint! For the first stone, we went with blue and white polka-dots, and then some adorable red and yellow hearts for the second stone.


Wait for the paint to dry before adding any patterns. We found that 2 coats of paint made the colours brighter and more opaque.


While waiting for the paint to dry (again!) you can prep the wire for the photo holders. Take one end of the wire and loop it around any pen or marker about 2-3 times. Tip: use the pliers to loop and twist the wire into a super tight coil.

Once the paint is dry, it's just a matter of wrapping the other end of the wire around the stone about 2-3 times so it's secure. Then, snip off the excess wire with a wire cutter. You can also tuck the snipped end of the wire under the loops at the bottom to avoid any nasty poking incidents!


And that's it! We repeated the same process with our second stone. Here's some pics of the finished products:


What do you think of this DIY? We'd love to see how these photo holders would look like using pebbles of different shapes and sizes, with different decorations (rhinestones, anyone?) or with copper coloured wire!
That's it from us this week. Until the next time: happy crafting, everyone!