Say it with a Stencil: Initials DIY

For today, we're going to make an easy breezy DIY to kick off the weekend! It's perfect as a quirky art piece to hang up in your home; framed or plain, you can even have the kids do their own initials for their bedroom door. Let's get started!
Materials:
- Art paper. We used a slightly thicker paper so that the paint wouldn't bleed or leak through.
- A print-out of a letter or initials of your choosing
- Paint (you can use whatever's handy, but we used poster paint here)
- Penknife or scissors
- Ruler
- Paintbrushes
- Paint palette or mixing tray
- Cotton buds

Let's get started! Cut out the printed letter. Since our letter was an "L", it was easier for us to use the ruler and penknife, but if your letters are curvier, we suggest using a pair of scissors instead. Once you've cut it out, place the letter in the center of the art paper. You can secure it using blue tack, or simply hold it in place with your fingers.


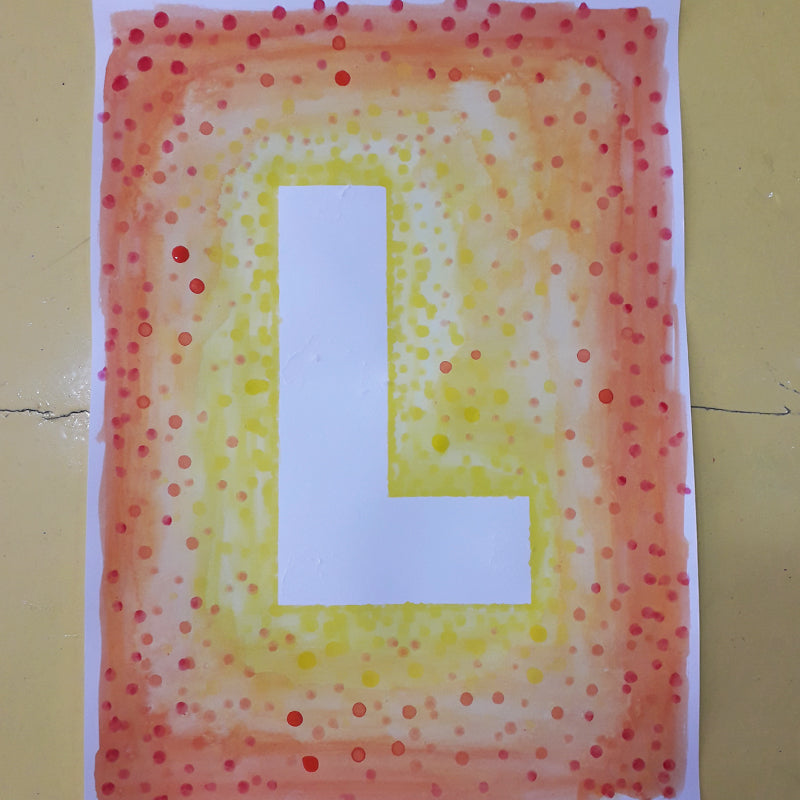
Get your colours ready! We used yellow, orange, and red because we wanted to create a kind of gradient or ombre effect.


Here's a nifty technique for painting projects: use cotton buds to make tiny dots for a bit more texture and interest. It's such a simple technique, but it really makes a difference! Go slowly and carefully to avoid moving the letter for a crisp, sharp edge.

Remove the letter, but only once the paint has dried fully. You don't want to smudge all your hard work!


And we're done! You now have a cool piece of customized artwork to hang up on the wall and brighten up your home! We hope you enjoyed today's DIY, and until next time: happy crafting!