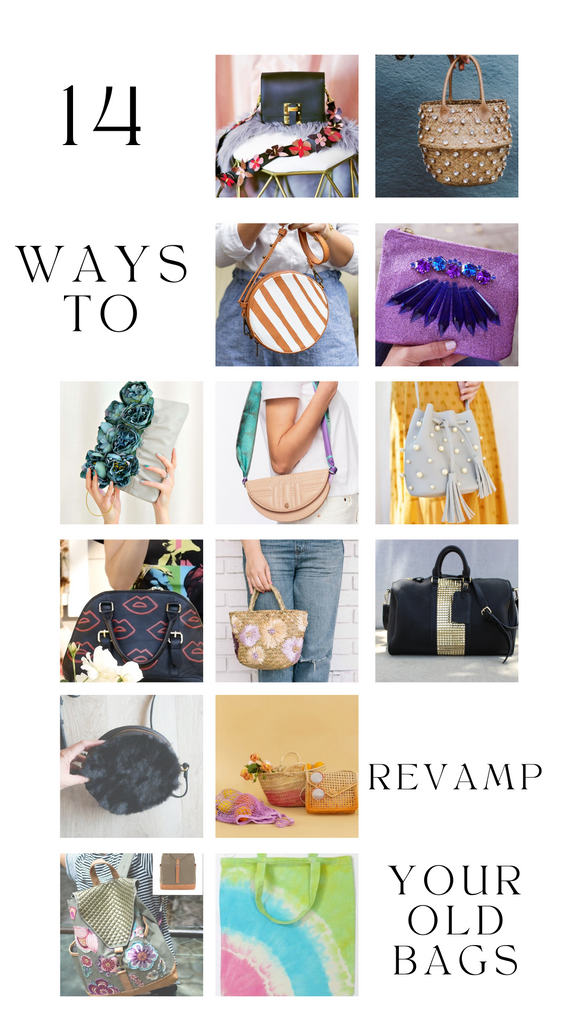
DIY Envelope Bookmarks

I don't know about you, but our house is simply overflowing with envelopes from banks, and bills, bills, bills! We noticed the funky patterns printed on the inside of the envelopes, and with some awesome inspiration from Stickeriffic (a company that sells cute stickers, decals, and stationary), we transformed our plain, used up envelopes into 2 adorable bookmarks. (Psst, check out the Stickeriffic Facebook page while you're here!)

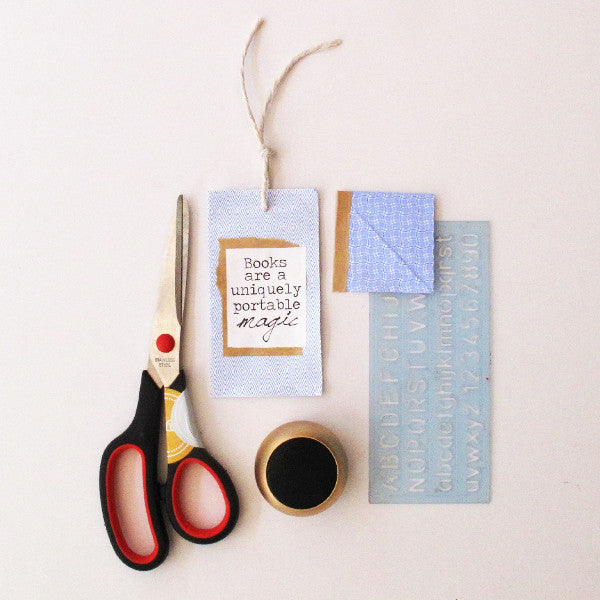
The first thing you'll need is an envelope! Cut it open with a pen knife or scissors (carefully!) to expose the pretty pattern inside. Next, cut out various rectangle and square shapes to make the bookmarks.


Once you've done that, it's time to glue the two sides together, and decorate! Sticking a quote, and some scrap paper onto the front of your bookmark are simple ways of making it look more interesting.


Here's a nifty trick: instead of using ribbon, use twine! It gives it a more rustic and vintage look to your bookmark. Also, if you're gifting this bookmark to someone, twine is more gender neutral than ribbon. A win-win!

The finished product! Not too shabby ;)
But that's not all! We were on a roll, so we decided to make one of those adorable page corner bookmarks we've been seeing everywhere online. Using some more pieces of envelope from before, we cut out a rectangle. The rectangle, once folded, should be a perfect square (like in the photo below):

Next, turn it so the plain side is facing you, and place your glue in a narrow strip along the top of the rectangle, and only the top! Fold it in half, and let the glue dry.


Once the glue is dried, you should have a square or diamond shaped pocket, perfect for sliding on to the tops of your pages! This next step is optional: we thought the bookmark looked a little plain, so we decorated it with some leftover scrap paper, and we also wanted to reinforce the glued edge.


Here's the wee pocket bookmark in action!


All in all, we're super satisfied with how our bookmarks turned out. How would you make yours? We'd love to see your creations! Happy crafting, everybody!